
When it comes to building the ultimate Wall Control pegboard setup, the panels are just the foundation — the real magic happens when you choose the right accessories. But with bins, shelves, and brackets all available in multiple sizes and styles, it can be tricky to decide which is best for your tools and supplies. This guide breaks down the differences, explains when to use each option, and shows you how to get the most out of your pegboard.
Why Accessory Selection Matters
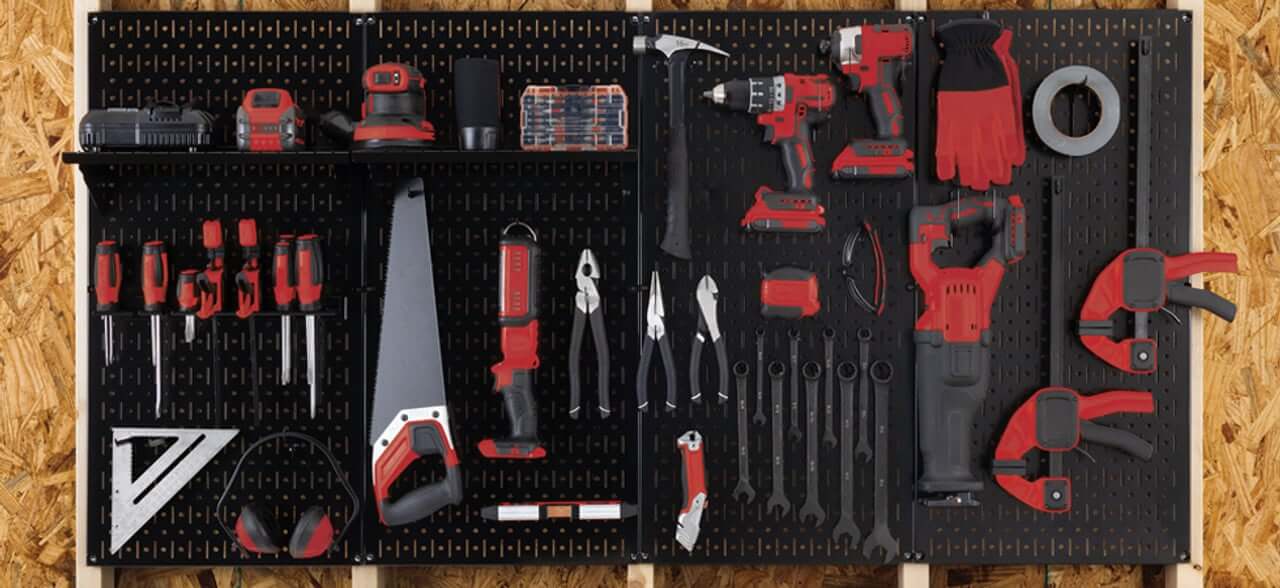
An organized tool wall isn’t just about appearance — it saves time, improves workflow, and protects your equipment. The wrong accessory can waste space, lead to clutter, or even damage your tools if they aren’t properly supported. By understanding the strengths of bins, shelves, and brackets, you can build a system that is not only tidy but also efficient and durable.
Option 1: Bins – Small Parts, Big Impact
Bins are the unsung heroes of any pegboard system. They keep screws, bolts, washers, and other small parts organized and visible. Wall Control bins are designed to lock into the metal panel slots so they won’t pop off like traditional plastic pegboard bins.
Best for:
Loose hardware (screws, nails, washers)
Electrical connectors, zip ties, fuses
Craft supplies, sewing notions, or office items
Pro Tip: Label your bins or use color coding to make it easy to grab the right size fast. For maximum efficiency, group bins by project type — for example, all fasteners for woodworking in one section, and automotive clips in another.
Option 2: Shelves -- Versatility for Larger Items
If bins are for the small stuff, shelves are for everything in between. Wall Control shelves come in various widths and depths to support heavier, bulkier tools that don’t fit well in bins. Powder-coated steel construction means they can hold serious weight without sagging.
Best for:
Power tools (drills, sanders, battery chargers)
Spray paint cans, oil bottles, and cleaning supplies
Toolboxes, storage cases, or organizers
Pro Tip: Keep heavier items on lower shelves for safety and easier access. Use narrow shelves near eye level for frequently used items like tape measures or cordless tools.
Option 3: Brackets – Secure Support for Heavy Gear
When strength matters most, brackets are the accessory of choice. Wall Control brackets come in multiple lengths and angles, and many are rubber-coated to protect tool finishes. They are ideal for holding items that need a secure cradle rather than a flat resting surface.
Best for:
Long-handled tools (shovels, brooms, rakes)
Extension cords, hoses, or cables
Sporting equipment like bats, paddles, or skis
Pro Tip: Morning
Putting It All Together
The real secret is combining bins, shelves, and brackets in a way that matches your workflow. Start by categorizing your tools and supplies, then assign them to the right type of accessory:
Small items: go in bins near eye level
Medium / bulky tools: go on shelves
Long or heavy items: get brackets at shoulder or lower height
Sketching your layout or using painter’s tape to mark accessory locations can help you visualize the final setup before you install anything.
Frequently Asked Questions
Q: How much weight can Wall Control accessories hold?
Bins can easily support several pounds of small parts, shelves typically hold 20–50 lbs depending on size, and brackets can hold even the heaviest of tools. Wall Control panels mounted to studs can hold more weight compared to panels mounted to drywall.
Q: Can I mix bins, shelves, and brackets, on the same panel?
Absolutely. Panels are modular, so you can rearrange or mix accessories any way you like.
Q: What if my storage needs change?
That’s the beauty of Wall Control — accessories can be repositioned, swapped out, or added as your tool collection grows.
Final Thoughts
Choosing the right pegboard accessories is the difference between a cluttered wall and a streamlined, professional-grade workspace. Bins keep your smallest hardware in order, shelves make bulky tools easy to grab, and brackets provide rock-solid support for heavy gear. With the right combination, you can turn any Wall Control panel into a storage powerhouse that saves time, prevents frustration, and looks great doing it.
Share:
5 Weekend DIY Projects Using Wall Control Panels